
Sometimes you may want a friend, family member, or partner to join one of your sessions with you. You can do this by adding them as a Trusted User. Once your trusted user is approved, they'll be able to log in and join the specific appointment you've added them to.
What is a Trusted User?
A Trusted User is a guest you've given permission to join one of your therapy sessions. Adding someone as a Trusted User doesn't give them access to your full account — they can only see and join the appointment(s) they've been linked to.
Every Trusted User goes through a quick approval step with our Care Coordinator team before they can join a session. This keeps your sessions secure and ensures your guest is properly verified.
How to Add a Trusted User
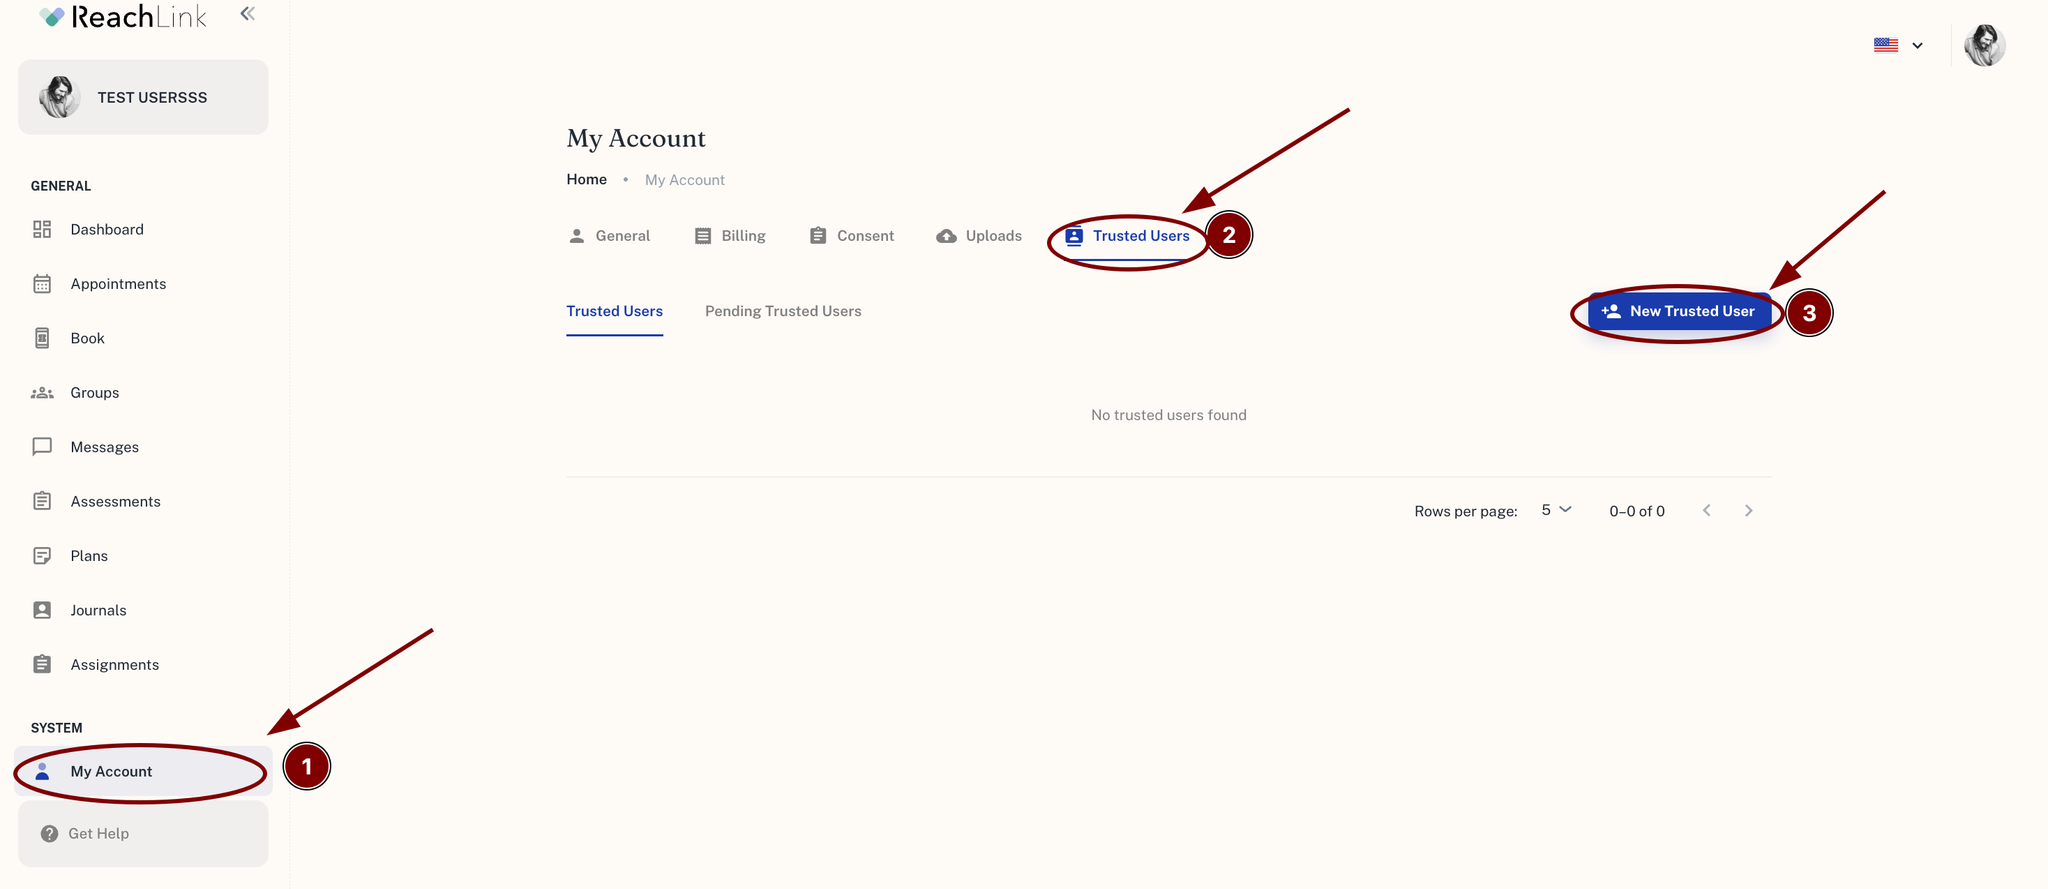
- Click your profile picture in the top-right corner and select Account settings.
- From the left menu, select Trusted users.
- Click + New trusted user in the top-right corner.
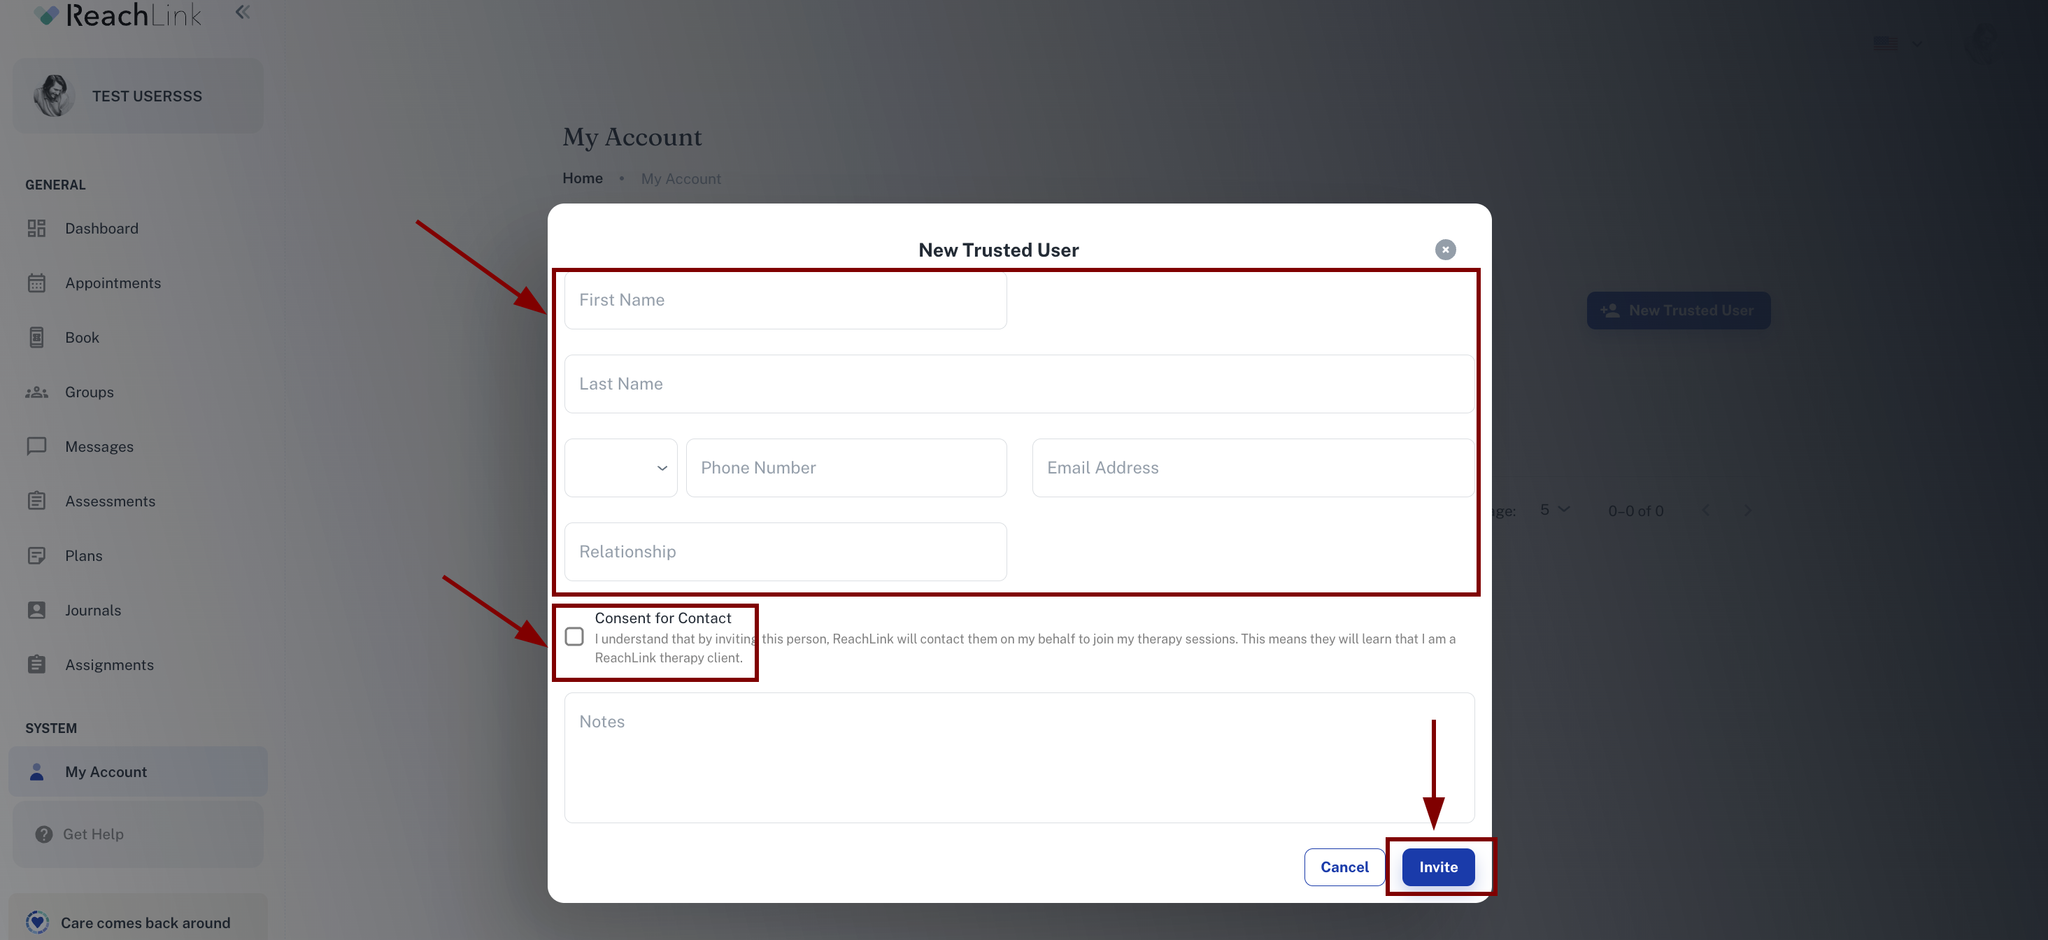
- Fill in your guest's details:
- First name
- Last name
- Phone number
- Email address
- Relationship (e.g., Friend, Spouse, Parent)
- Notes (optional — anything helpful for our team to know, like availability)
- Check the Consent for contact box to confirm your guest has agreed to be contacted by our Care Coordinator team.
- Click Invite.
Your guest will now appear under the Pending Trusted Users tab while their invitation is being processed.
Removing a Trusted User
- Go to Trusted Users or Pending Trusted Users.
- Click the ⋮ next to their name.
- Select Delete user.
- Confirm by clicking Delete in the pop-up.
⚠️ Once deleted, a trusted user can't be recovered — you'll need to send a new invitation if you want to add them again later.
What Happens After Approval?
Once your guest's invitation is approved:
- They'll move from Pending Trusted Users to Trusted Users in your list.
- They can log in to ReachLink (web or mobile) and will see the appointment you added them to under their Appointments tab.
- They can join the session normally from there.
If their status still shows as Pending, they won't be able to see or join the appointment yet — this usually means our Care Coordinator team is still completing verification.
Frequently Asked Questions
Can my Trusted User see my other appointments or personal information?
How long does approval usually take?
Can I add someone who already has a ReachLink account?
What if I want to remove a guest's access after they've joined a session?