Before joining a session, ReachLink gives you the chance to run a quick pre-call test to make sure your camera, microphone, speaker, and connection are all working properly — so you can catch any issues before your client joins.
How to Run a Pre-Call Test
- When you're about to start a session, you'll see a “Run a pre-call test” prompt: “A quick test to ensure your equipment is working properly and there are no technical difficulties in the meeting.”
- Tap Run test (or Skip test if you'd rather join directly — not recommended if you haven't tested recently).
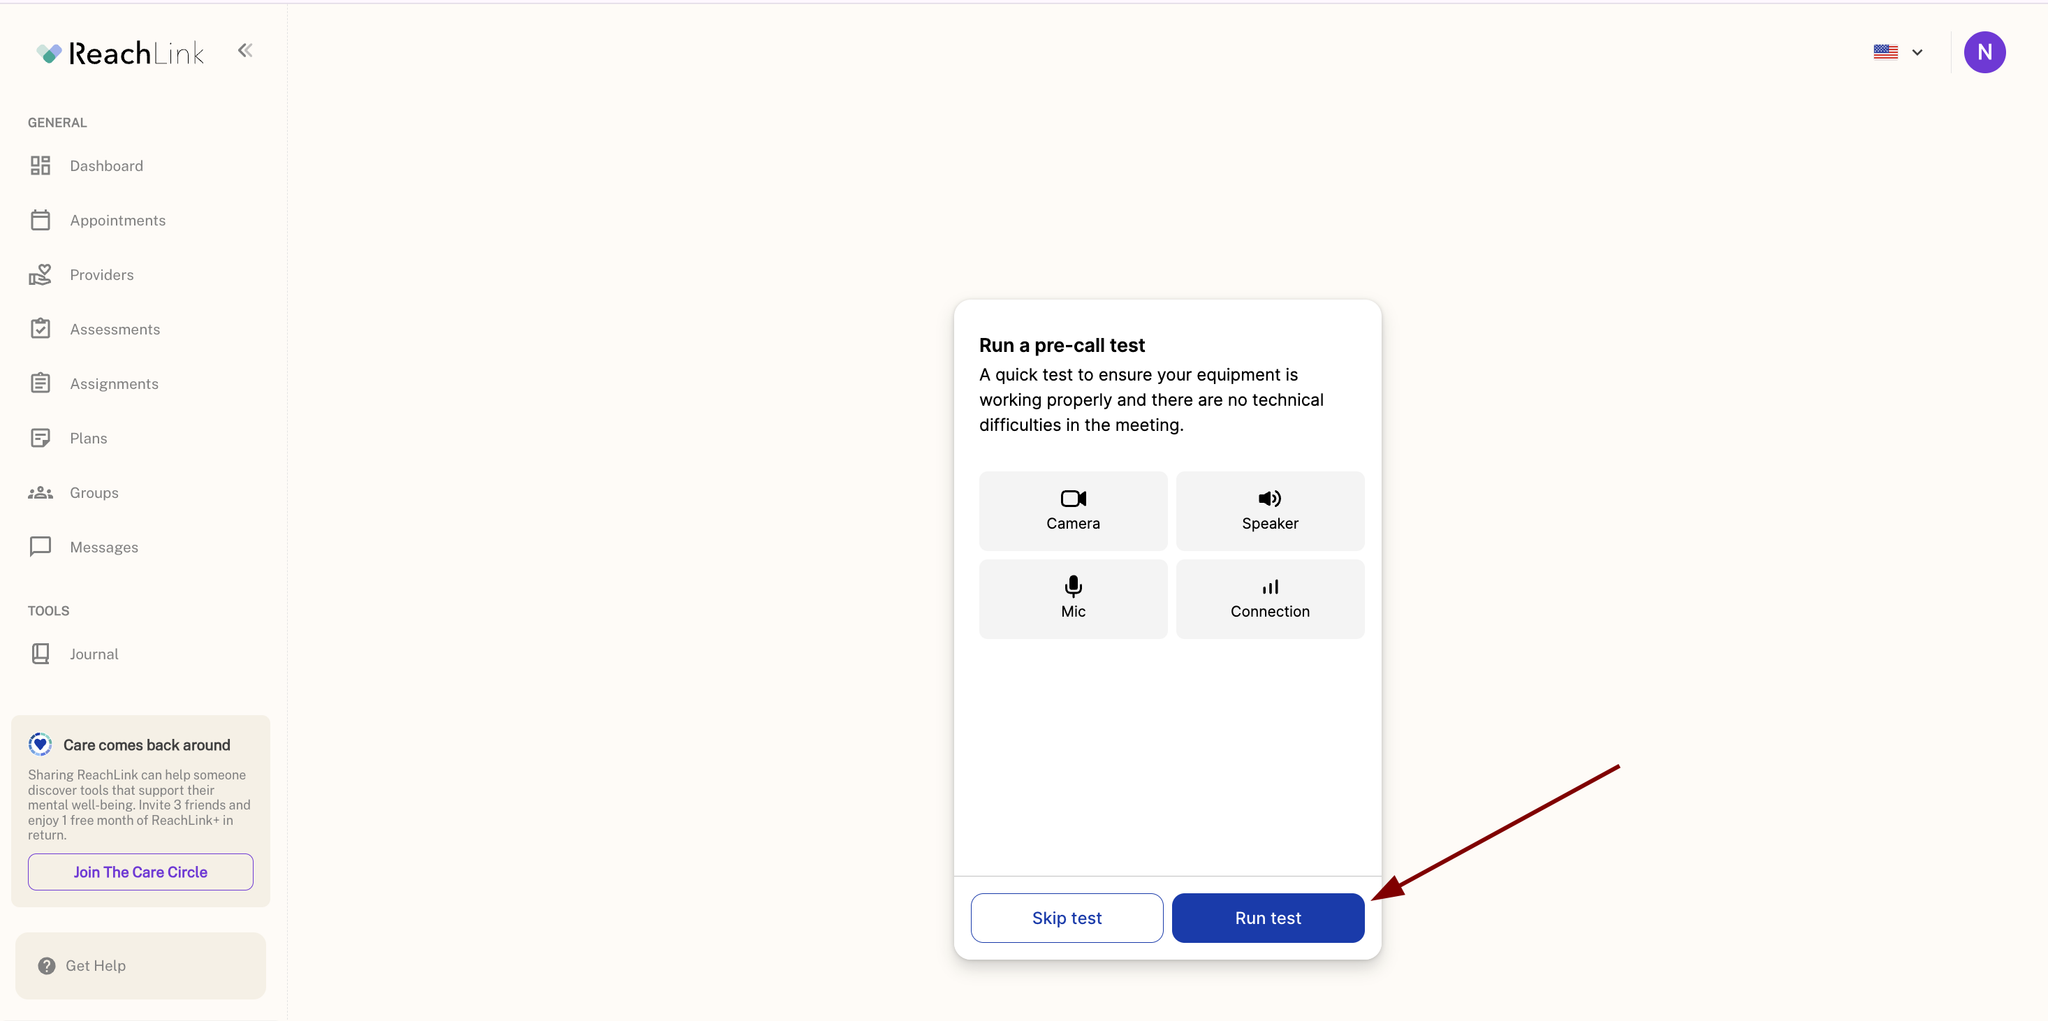
The pre-call test prompt
- Camera check: You'll see your camera preview and be asked “Can you see yourself?” Confirm the right camera is selected from the dropdown, then select Yes, I see myself or No, I don't.
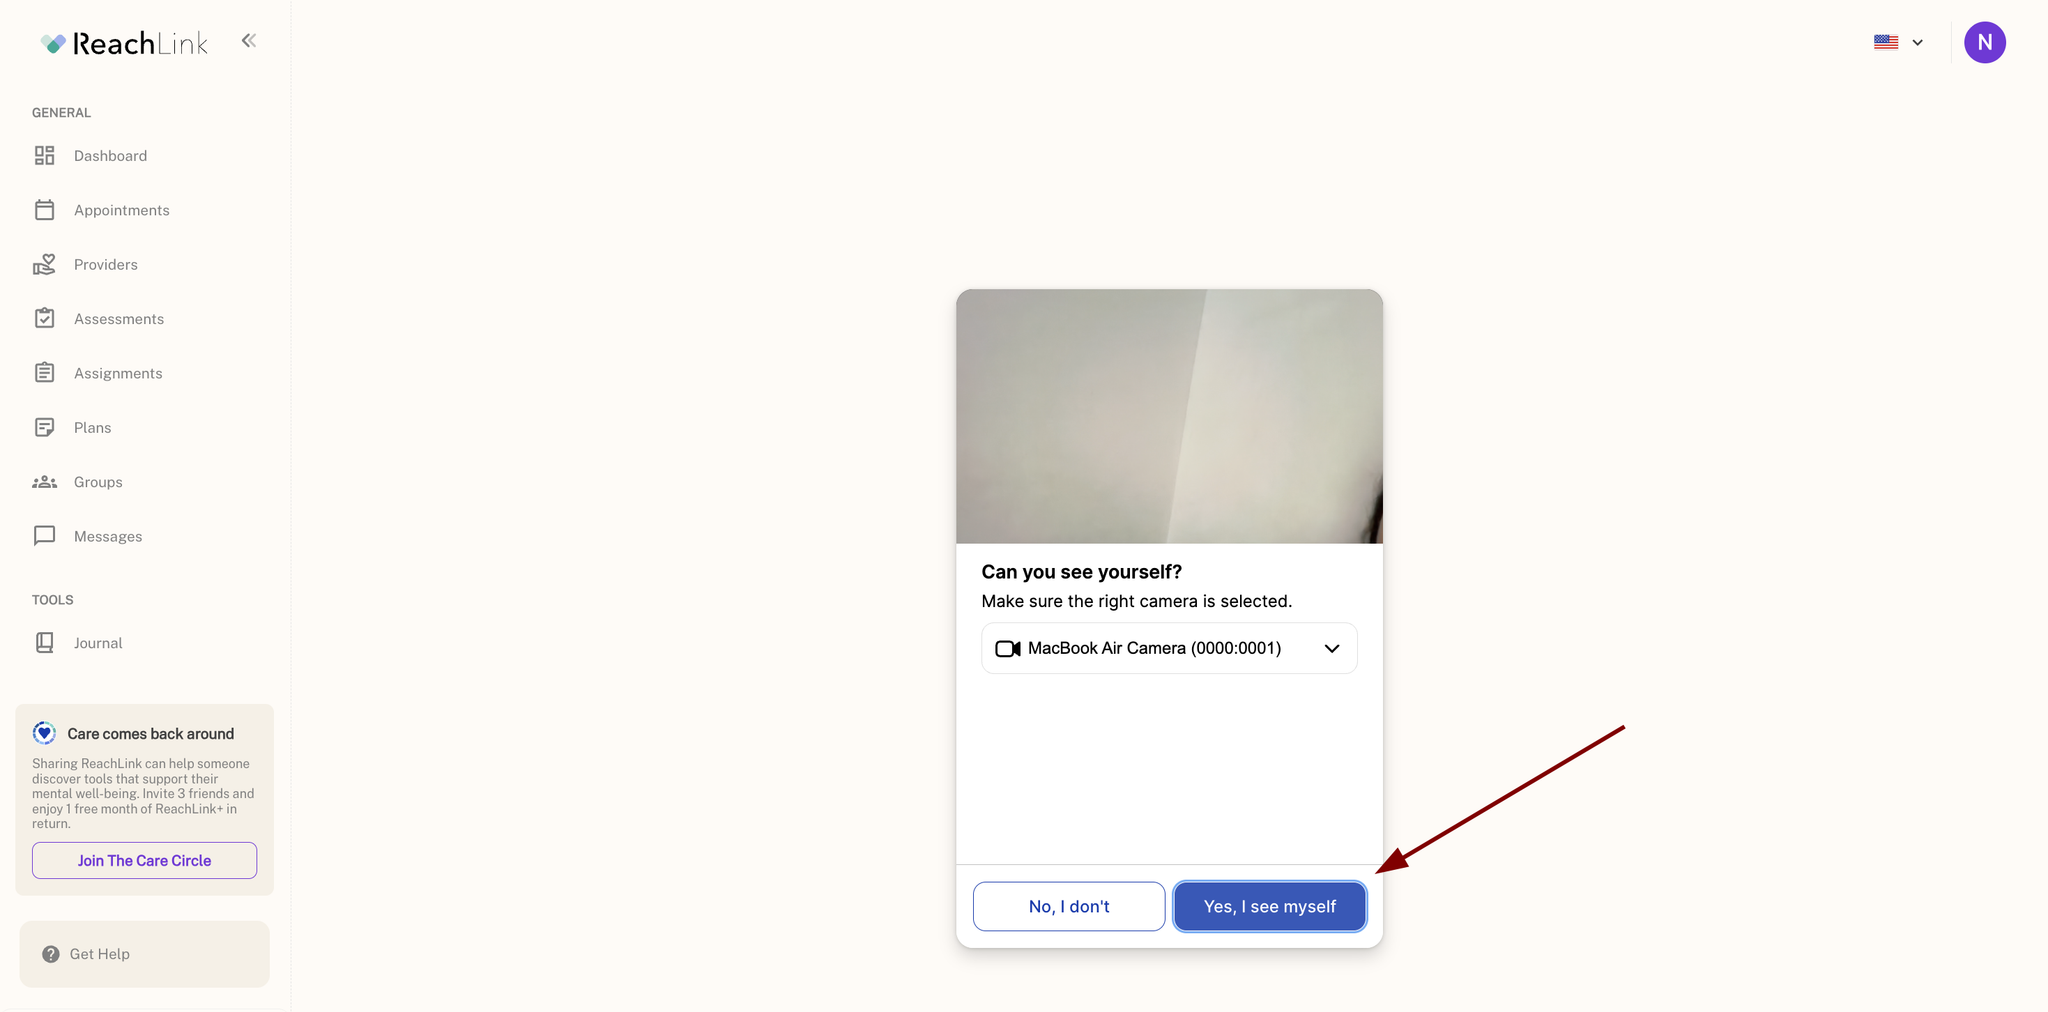
Camera check step
- Speaker check: You'll hear a test sound and be asked “Can you hear the music?” Confirm the right speaker is selected, then select Yes, I hear music or No, I don't.
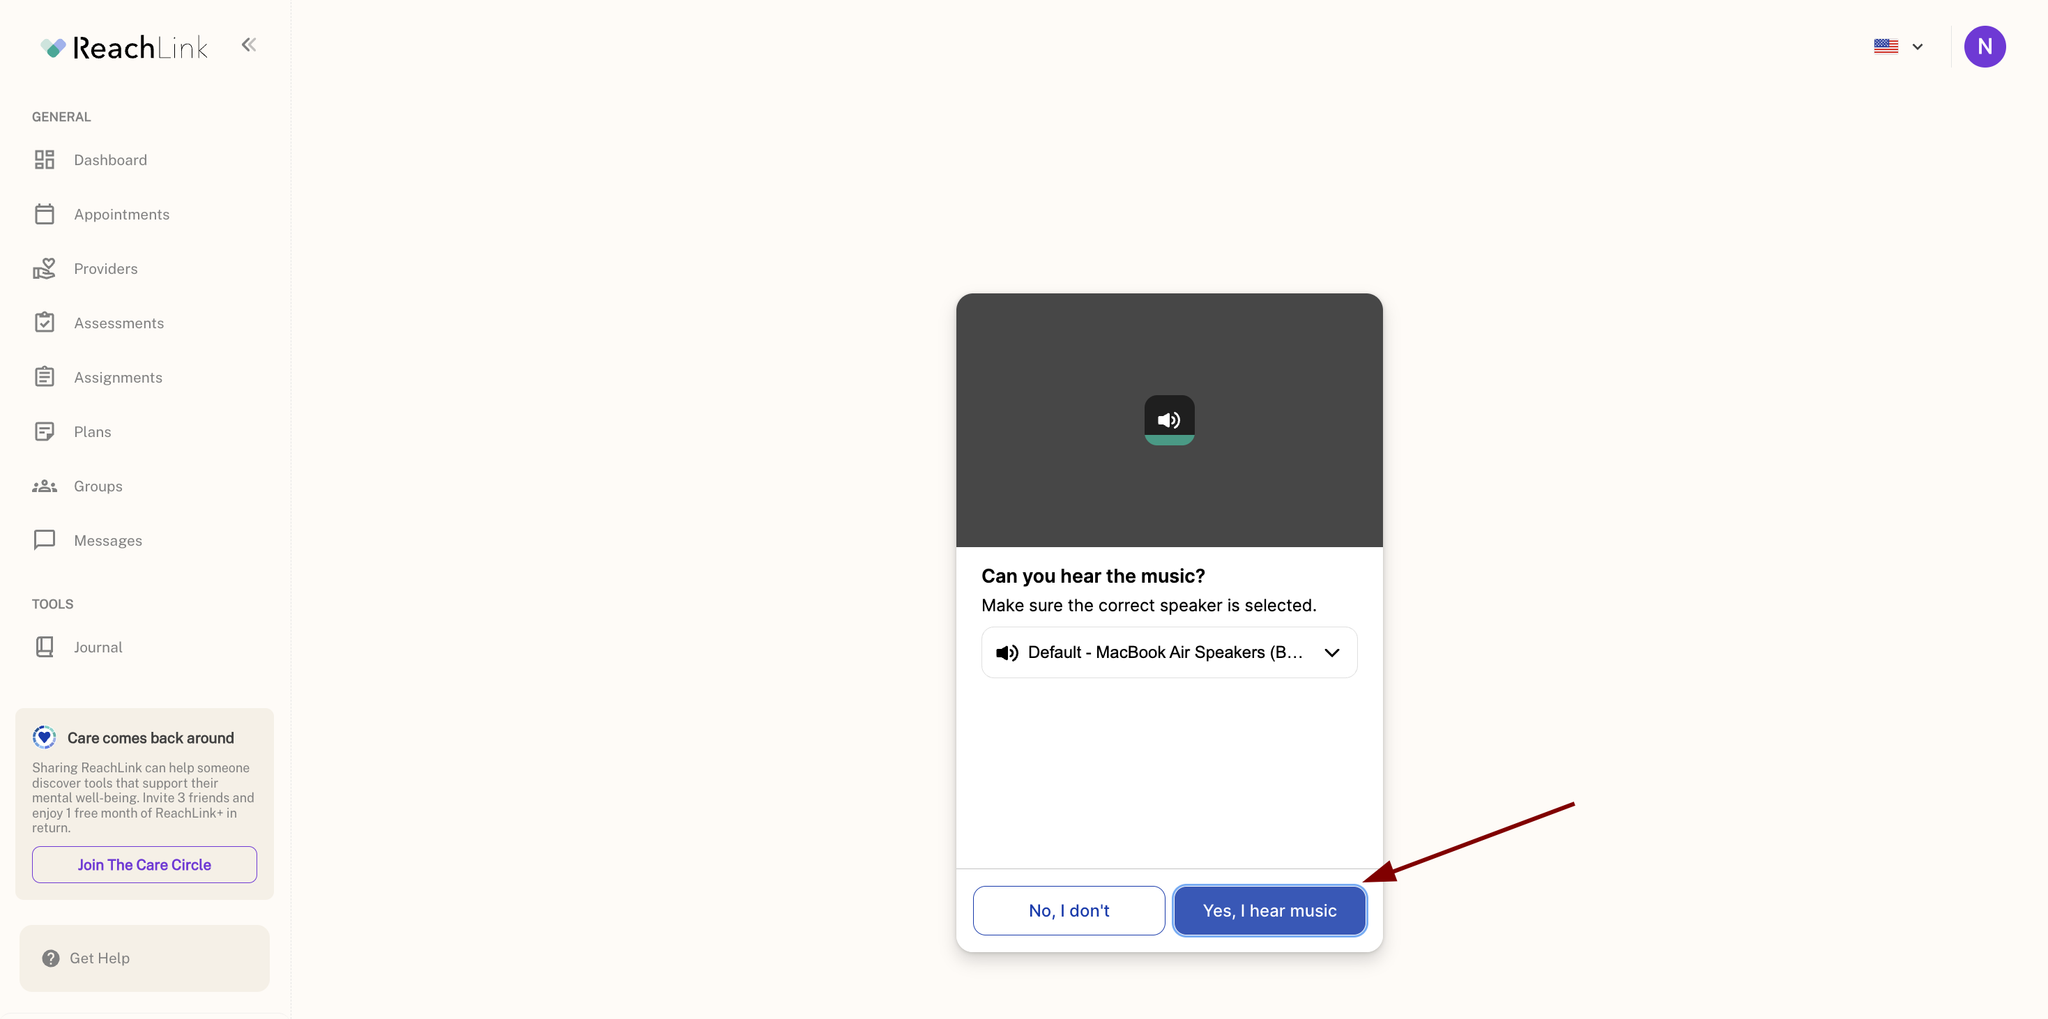
Speaker check step
- ReachLink will then test your connection, showing a progress indicator (“Testing your connection — Please wait one moment...”).
Reviewing Your Results
Once the test finishes, you'll see a summary of all four checks — Camera, Speaker, Mic, Connection — each marked with a status icon:
- Green check — working properly
- Red X — not working, needs attention
- Yellow question mark — untested or inconclusive
If everything passes, you'll see “Everything looks great — All devices are working properly. You shouldn't experience any problems during this meeting.” Tap Continue to proceed to your session.
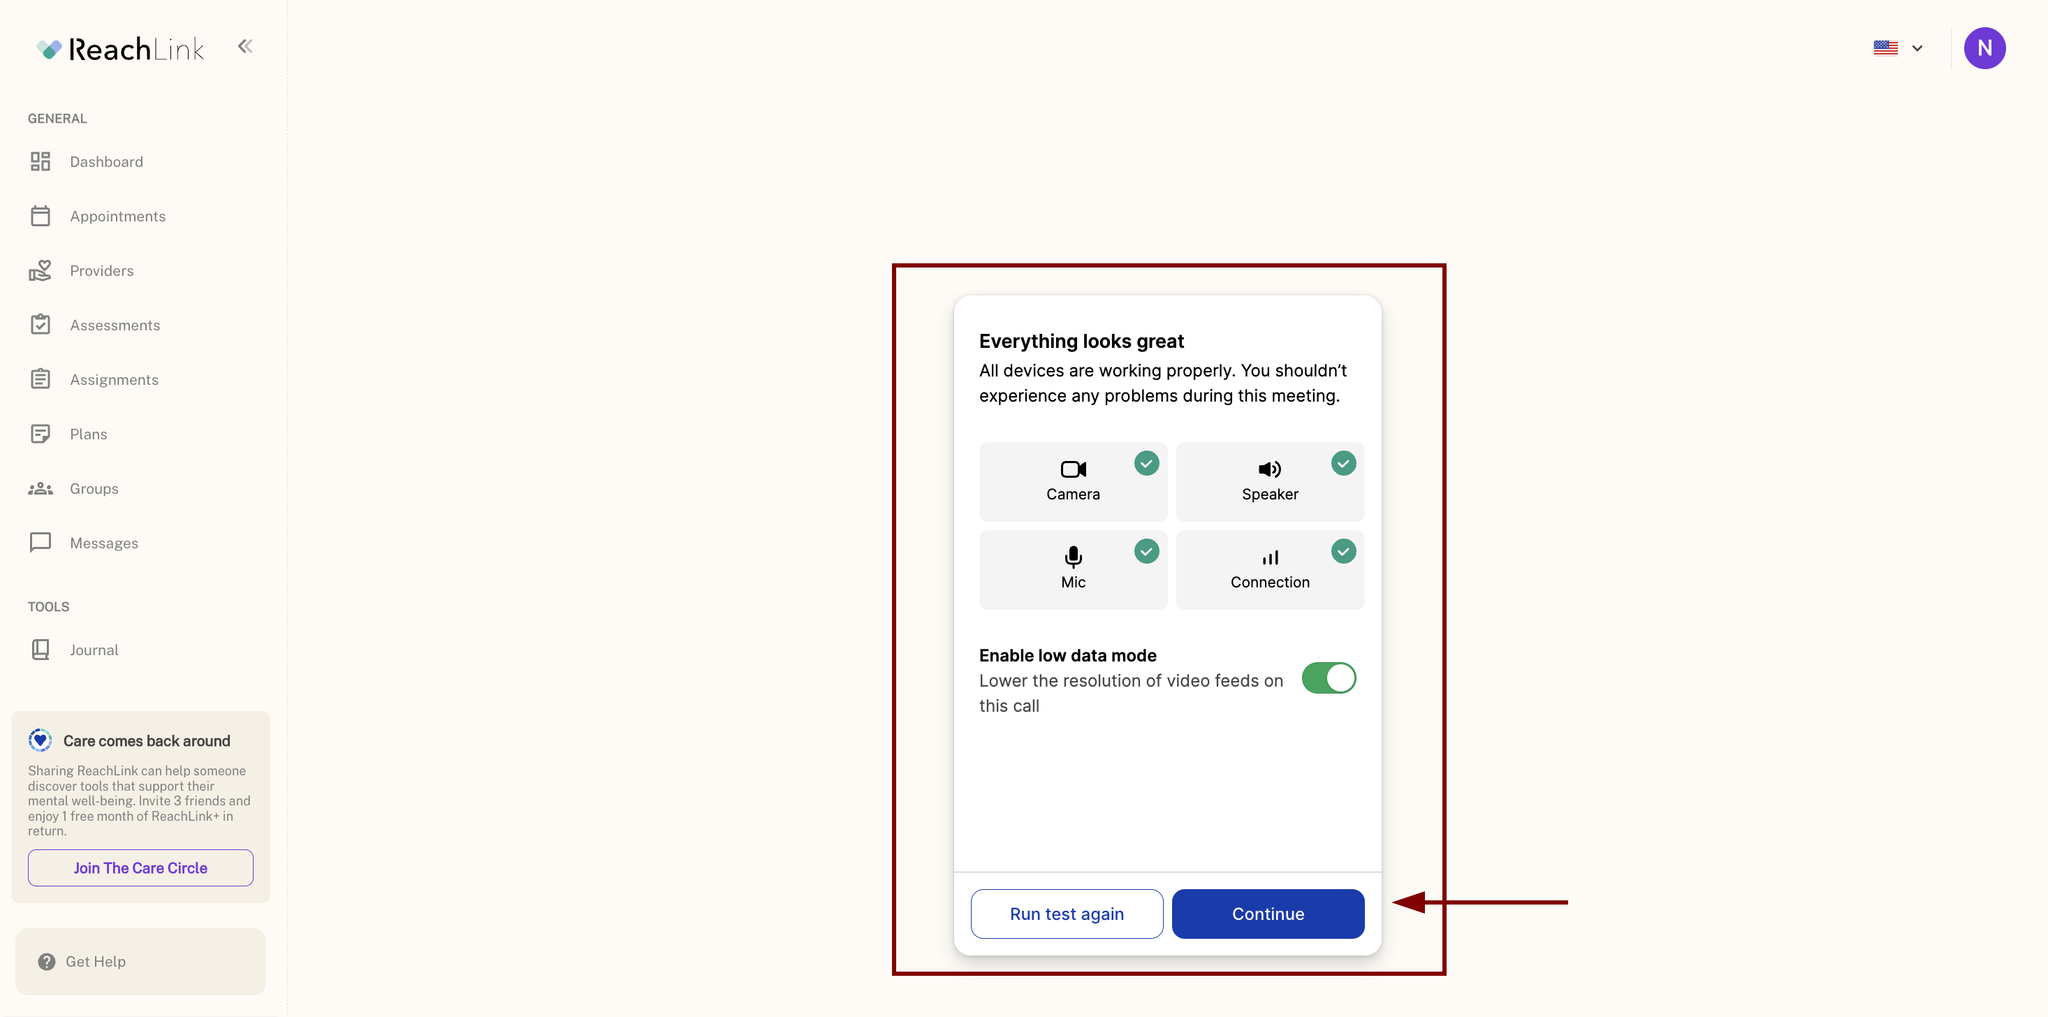
Results screen when every check passes
If something didn't pass, you'll see “You might experience issues — Some devices may not be working properly. See our steps to help fix any issues.” From here you can:
- Help me fix this — opens troubleshooting steps specific to the issue
- Run test again — after making changes
- Enable low data mode — lowers video resolution if your connection is unstable
If You Need to Fix Something
Tapping Help me fix this opens a troubleshooting guide covering:
- Camera or Microphone are blocked — usually means browser permissions were denied; steps are provided for both desktop and mobile to re-allow access
- Loudspeaker issues
- Connection issues
Joining the Session
Once your test passes (or if you skip it), you'll land on the pre-join screen showing your camera preview and current device selections (Camera, Microphone, Speaker). Confirm these are correct, then tap Join meeting.
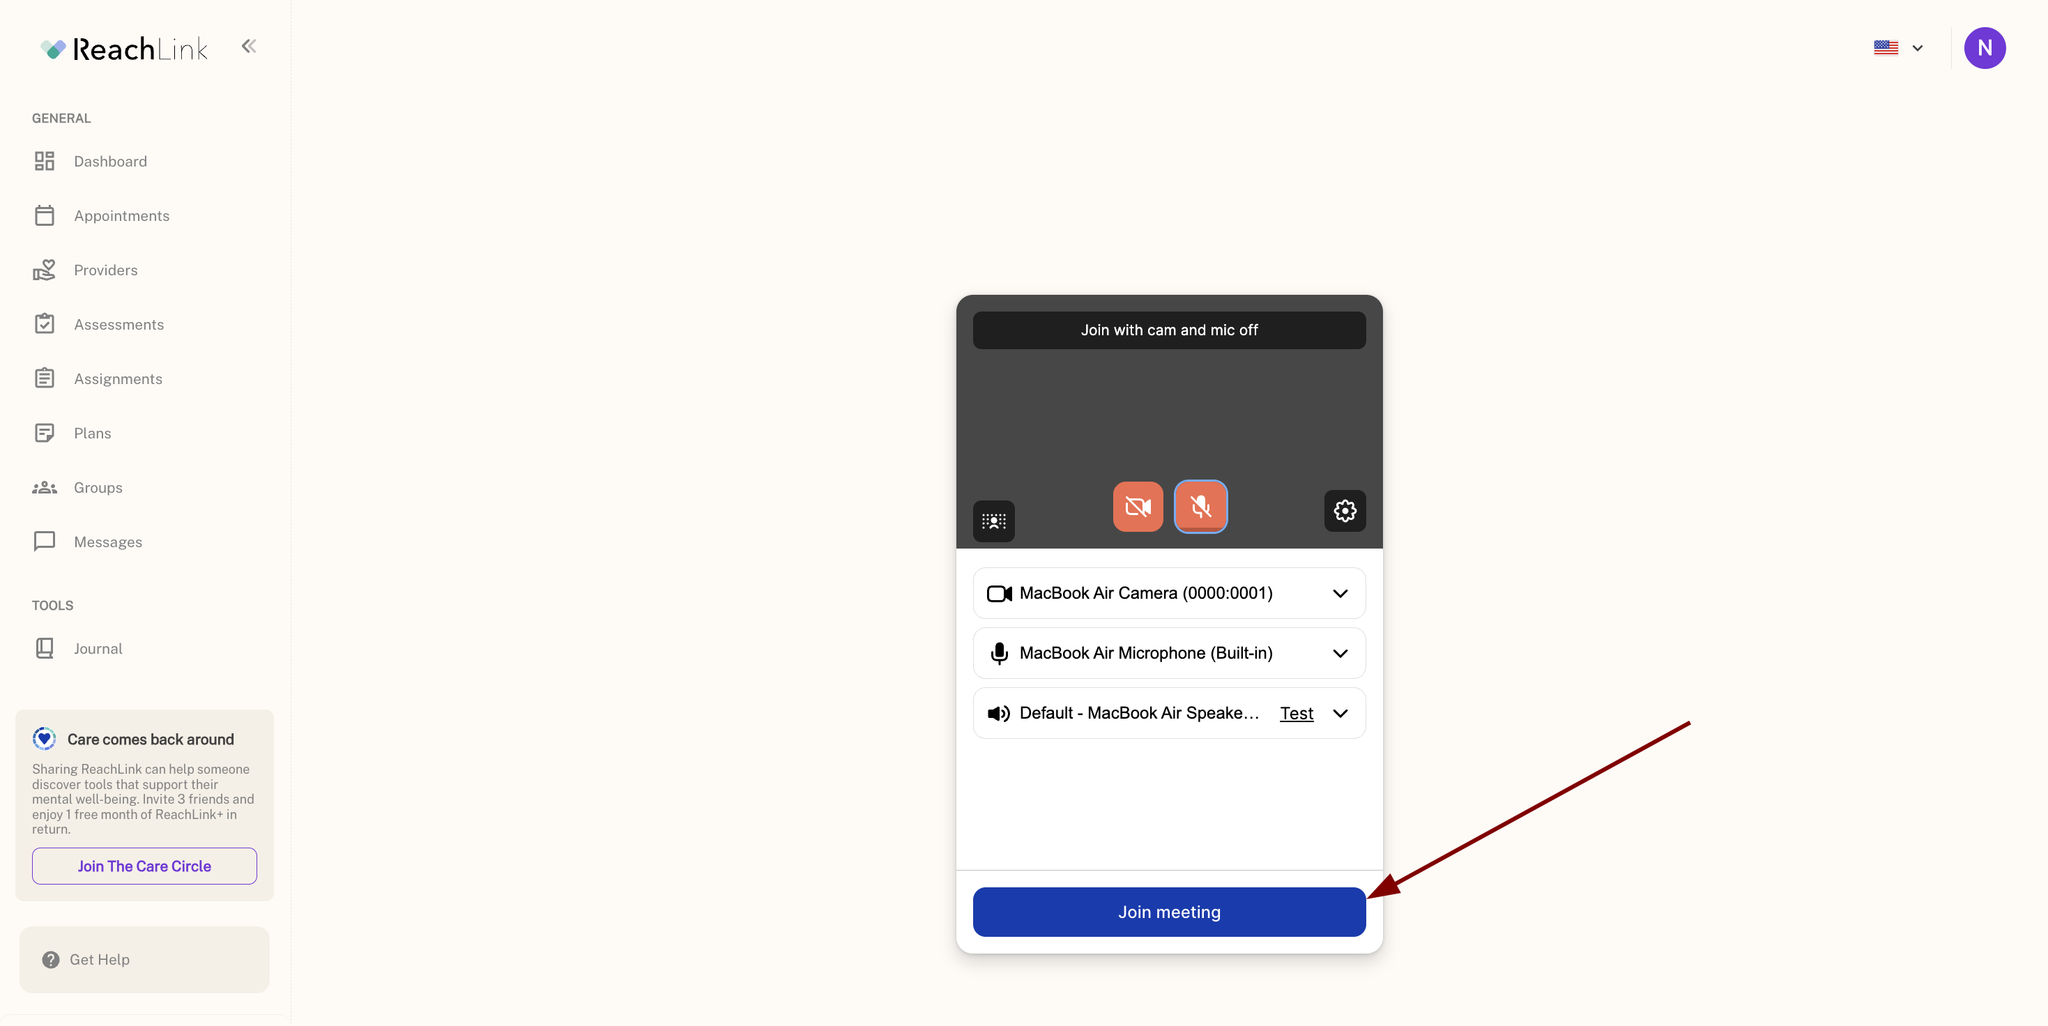
Pre-join screen
Adjusting Your Settings Mid-Session
If you notice an issue after you've already joined, you don't need to leave and rejoin:
- Tap the gear/settings icon in the top-right corner of your session window.
- Under Device preferences, select Video & Audio.
- From here you can change your Camera, Microphone, and Speaker, and toggle:
- Noise reduction — reduces background noise in loud environments
- HD video — prefers higher quality video when available (uses more resources)
- Widescreen video — prefers widescreen video when available
- Mirror — mirrors your own video (self-view)
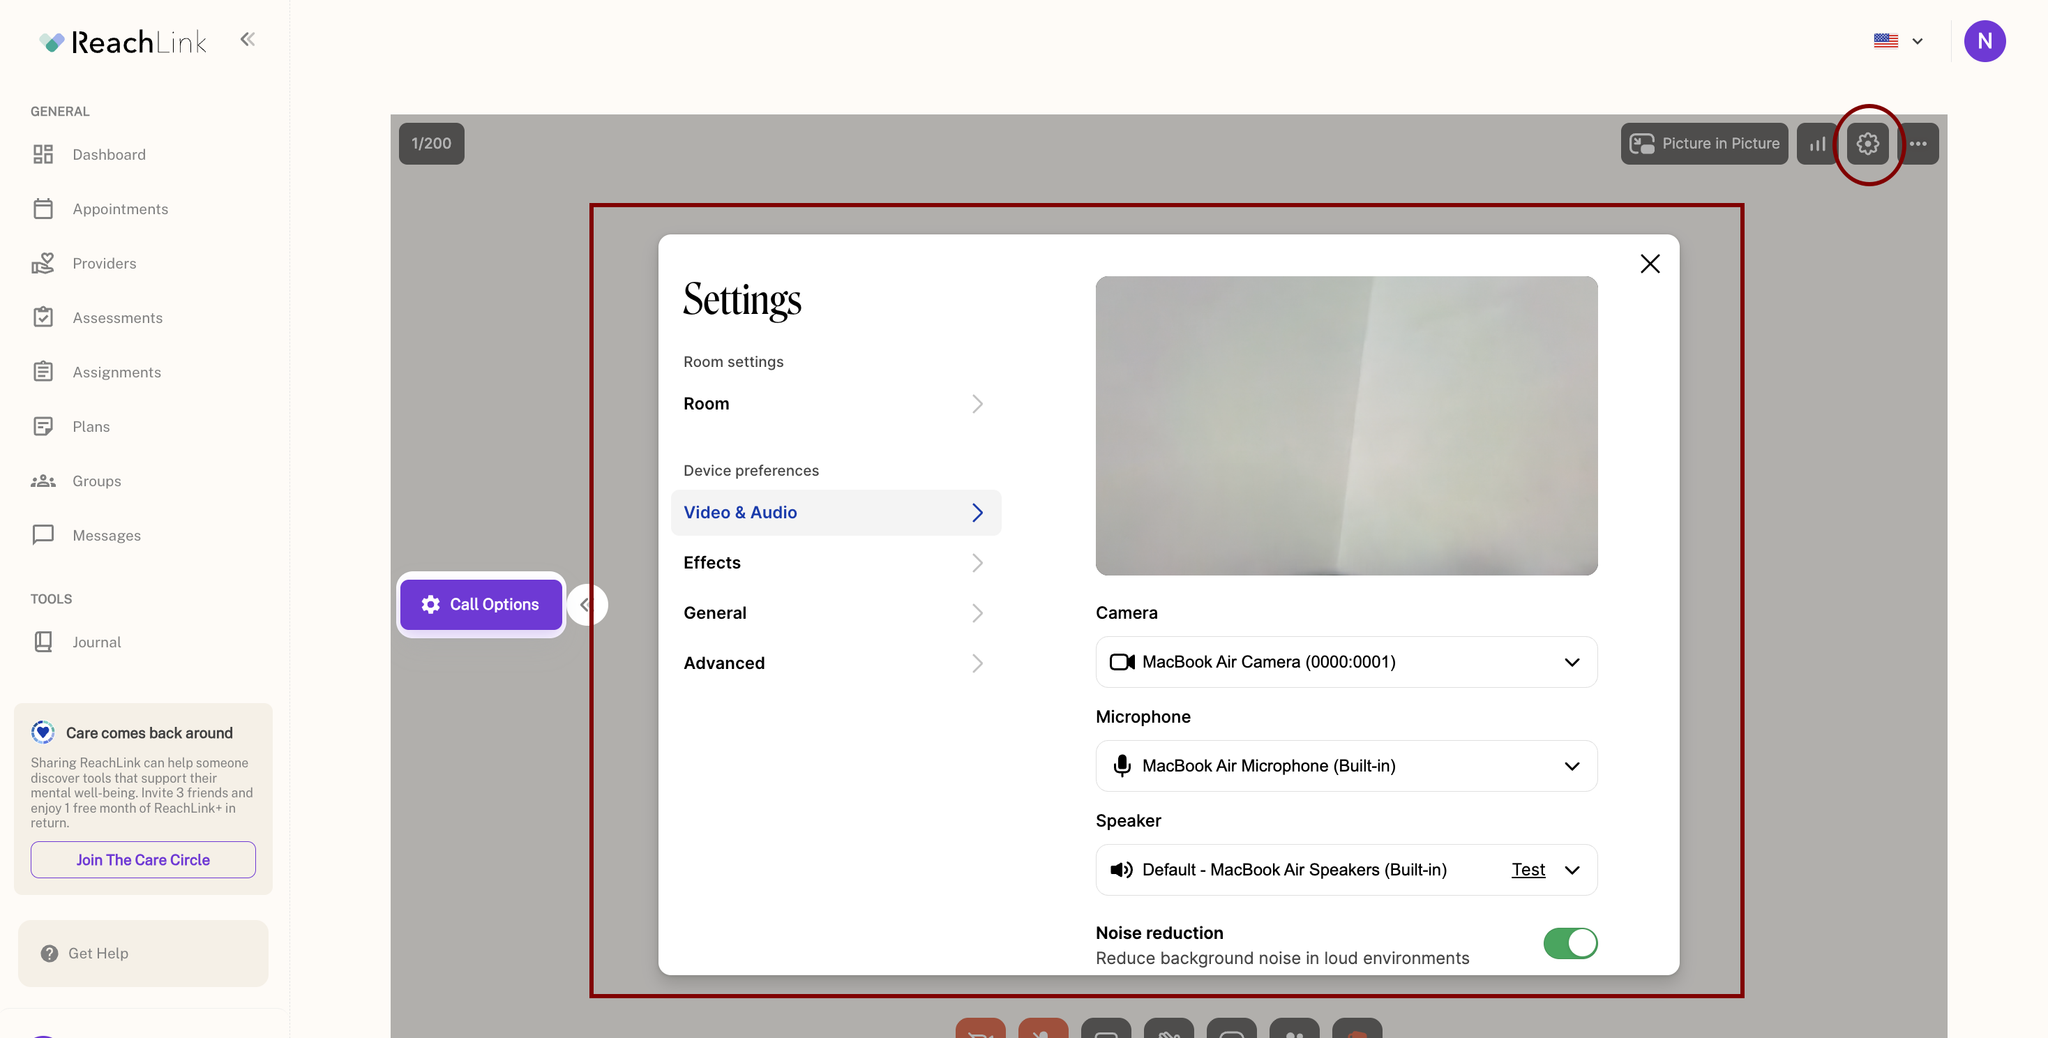
In-session Settings panel
Good to Know
- Running the pre-call test regularly — especially after switching devices, networks, or locations — helps catch problems before your client joins, not during the session.
- If your connection is unstable even after testing, try enabling Low data mode to reduce video resolution and ease bandwidth strain.
Where to get help
- Get Help in your ReachLink portal
- Urgent, or you need a live person: call 833-588-7992 (call only), or request an agent or live representative
- Email: support@reachlink.com